Showing posts with label Tutorial. Show all posts

Monday, 2 July 2012

Paper flower tutorial

As I have been using paper flowers as embellishments for many of my projects I thought I would do a quick tutorial on how to make them without any cardmaking tools. I love the punched and die cut flowers I use which are cut with my cricut and punches but for the sake of this blog I wanted to be able to make usable flowers without any added expense. The great thing about these flowers is they can be made out of any paper, so can be made very cheaply from copier paper, recycled pages, tissue paper, scraps, wrapping paper…..etc!!!!

To create ……..

Use a square of paper…..(doesn’t matter if its not exact)…. fold into quarters….then  fold one third just over the centre line….then another third folds behind…you should have a three way zig zag.

DSC_0010

Draw the shape of your petal, then cut the top portion off.

DSC_0011

The shape can the be formed…petals edges can be curled…or the shape scrunched…spritzing with water or hair gel then left to dry gives the shape quite rigid and natural form

DSC_0014

… the edges can be inked before

DSC_0015

….all these flowers were test pieces made out of cheap scraps or copier paper, different shapes were cut to create different shape petals…..some were created by folding extra times to create longer zig zags….and some were made of multiple layers

DSC_0024

The centres can be finished with buttons, beads, glitter, feathers or  miniture versions of the flower……

Try making flowers out of decorative papers, book papers. if you have rubber stamps the flowers can be over stamped before shaping……

…….possibilities of shape size and design is endless and be used as an accent or a focal point…….have fun!!!!


Thursday, 21 June 2012

Image Transfer–wax/release paper

This is a basic step by step tutorial on transferring a computer generated image onto card using an inkjet printer and wax paper (or any release backing paper from sticker sheets/sticky back plastic/sticker albums/postage labels etc.
DSC_0027
1. Create your image in a graphic programme or word document and print onto your chosen release paper. I used a waxy page from an old sticker album. (I rounded off the corners slightly just to prevent it getting caught in the machine) Don't forget to reverse the image if has any text on it.

DSC_0052 (2)
2. Ink side up work out approximately where the image is going to go on your project (this can be done more methodically but I will post details when I have experimented more!!). It helps to fix the base card to your work surface with masking tape to prevent it from moving,.


DSC_0053 (2)3. Carefully turn the wax paper over and position back over your card….have a piece of masking tape ready so that as soon as the paper is down you can anchor the image….the ink remains wet so it is important it doesn't move…. it will start to transfer as soon as it touches the card
DSC_0029
4. Lightly rub over the image to make sure all the image has made contact.


DSC_0030 (2)
5. Lift the wax sheet up and remove.

If you want to add to the project repeat the first five steps with the next design…..

“The wax paper can be lightly wiped clean with a damp tissue and reused once dry.”


. …..to continue with my project I printed on a small piece of backing paper (from sticky backed plastic). As it was small and thin I attached it to a carrier sheet                        

– first draft print the text then position the wax paper(attach with double sided tape) over the draft and print again with the correct setting.
DSC_0034 (3)


                                            ....Position and apply.


This card was created for a “CAS” (Less is More)challenge and used a wonderful image from THE GRAPHIC FAIRYthe cravat pin was a broken piece of jewellery!!
DSC_0049 (2)

Some ideas are not so suitable for paper projects but there are lots of other applications for this technique. Transferring an image gives a lovely subtle effect, I compared the finished result to standard printing for the challenge.  It really does depend on personal preference and desired finished effect as to when to use this technique, it’s also a useful technique for laying images over creative backgrounds.
Would love any comments and ideas on ways of image transferring....or just say hello
....thanks for popping by.


Thursday, 2 February 2012

Faux Washi Tape

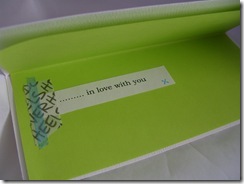
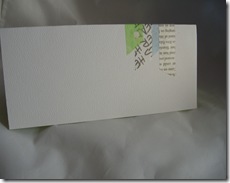
Warning…I have been playing!!!   ….spent ages fiddling and testing as I wanted to see if I could recreate Washi tape without spending anything extra but before I waffle, I will post the end result used on a card.  It was thanks to “Less is More” to give me a nudge to actually use my end products!  This week is a sketch, not normally one of my fave challenges but it instantly inspired me to use the tape and it was a good opportunity to make my hubbies valentine card

S1052404

S1052406     S1052408

I deliberately avoided the obvious valentine colours and my cards are often more about the words rather than the image. It was an extremely easy and quick card…..apart from the hours testing ways to make tape!!!! Oh and cutting out the lettering printed on the PC to create the message….fiddly!

Well this is how the tape turned out

S1052388

In the end I was quite pleased, but it is obviously not as instant as the proper washi/tissue/masking/decorative tape on the market as after creating the colour/ design I had to apply an adhesive to attach it, but the effect was very similar and the design can be tailored to the project.

I had to smile yesterday when my copy of Simply Cards and Papercrafts dropped through my door…there was an article on ……. creating WASHI TAPE!! The very talented Jo Kill has also been playing with the idea, she applied paper straight onto double sided tape, which obviously is better as the tape is instantly adhesive, and the effect is wonderful with tissue but other papers need reducing in thickness or it can just look like strips of paper stuck on. It was a fab article and the cards she produced with her tape are ….as always….stunning!

I wanted all my designs to have the same finish whatever their source, so I applied my designs under Scotch invisible sticky tape,  (actually I used a much cheaper brand for a lot of the test pieces), that way the top surface always had the same translucent effect on the top.

Initially I simply chalked (also used eyeshadow…which gave a lovely iridescent look) on the back (sticky side) of the tape, patterns can be created with strips of wax paper (backing off double sided!) or create a stencil or add punched shapes

S1052381         S1052391

I then moved onto transferring paper images, different papers needed different approaches…. some could…..

a) have the tape stuck straight on and cut out – great for tissue paper

b) burnished on and then ripped off (then trim sides)– great for fibrous paper , book pages, newspapers, old wallpaper

c) stick on tape, turn over,  lightly sand the back, brush back with water…..leave for a while….rub off backing paper – great for transfer of laser printed images, magazine images/text (I had generally poor results with the inkjet printed papers I tried)

S1052384

My next step was attaching the tape,  I was so pleased, I tried wet glues and dry glue (pritt), it didn’t affect any of the surfaces and several days on they haven’t dropped off despite leaving the test pieces on the windowsill. I applied the wet glue as a very thin layer with a glue spreader (an old plastic store card works just as well) and it was a lot quicker and easier than I anticipated.

S1052395

Still I had to try Jo’s version in comparison, not sure if you can see but there is a subtle difference, and both can be stamped on if required (I used stazon…mine took longer to dry). Cost wise Jo’s is a lot cheaper as I used Poundland double sided tape but based on using actual Scotch brand tape mine works out as    (but there are much cheaper invisible tapes available). My set of washi tape worked out as approx 30p a metre (bought a set of 5 different widths £14.25 + 1.50 p&p)

….and  the inspiration behind my card….. was a piece of tissue in a boot box which has “head over heels” written all over it…..I had to buy the boots….they were reduced from £80 to £6…..they were two sizes to big …...but I really wanted that tissue!!!!!!!!!!!!!!!!!!!!!!!!!!!!




Wednesday, 19 January 2011

DIGI TO SKETCH

I have made this card for a challenge at CRAFT CREATIONS
I also used a free digi image that can be found on their blog. It was perfect for an idea I wanted to try. There are now so many great digi images, many of them free which I do think is amazingly generous of artists to share their work and I think it only right to acknowledge their work and make sure you do not break any terms and conditions they stipulate.

Sometimes I have only wanted to use part of an image or not wanted a black outline or in this case, I wanted to do a watercolour techniques and as my printer is inkjet I sometimes find the outline can bleed into the colour.

So I decided to convert the image into a sketch.......


1.First import the image into "Word" to be resized.
Then draft print the image and roughly cut out the piece wanted.
Turn the image over and scribble over the back with a soft pencil.


2.Attach the image onto card (I used a scrap of Bockingford watercolour paper) with low tack masking tape (I used some cheap insulation tape my husband didn't want as it didn't stick properly...perfect!!)
Trace over the image with a ballpoint pen (it helps to use a different colour so it's easier to see where you have traced)


3.Remove the top image and using a pencil (HB or hard is best) sketch over the traced lines.


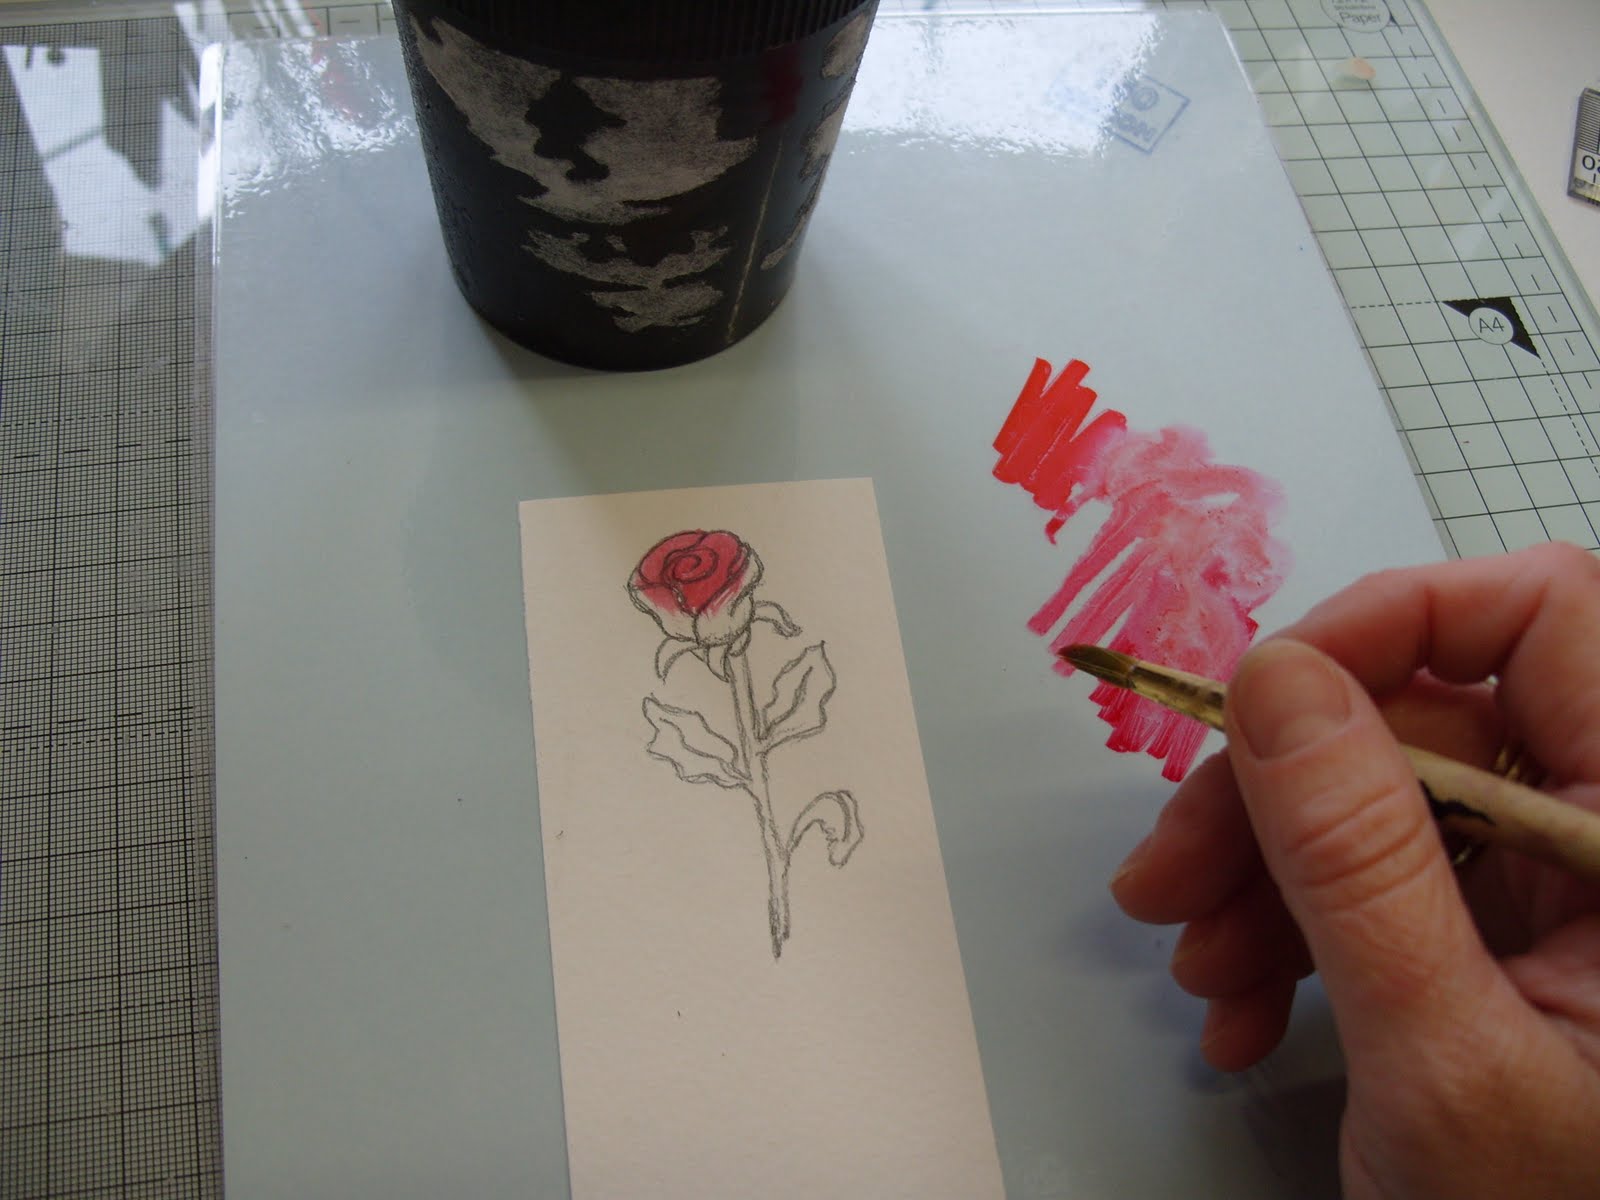
4.To colour the image I used ordinary waterbased felt pens. Scribble these onto a plastic sheet and then using a wet paint brush apply.


5.The green was very vibrant so I mixed in a bit of dark blue to darken the shade.

I trimmed the image down and tore the bottom edge and tinted with some more of the pen ink...I really like this effect ...especially as it disguised the dirty finger print I managed to put on the bottom!!


I finished the card by mounting it onto a bit of sandstone coloured card, tied some embroidery thread round and added a message printed on the PC.


I am also hoping to enter this in to CHALLENGE UP YOUR LIFE blog's "clean and simple" challenge....still trying to keep to this style this year!!!


Monday, 7 June 2010

Pocket Tag Card

Well I am on a roll, thought I would sort out details for the Pocket Tag card from the previous post. (but spot the deliberate mistake....Forgot to rotate the picture of the completed card, not sure how to remove it either!!). I have included a jpeg of the template which I hope can be copied if necessary.

It really is a simple wallet shape designed to fit in a standard C6 envelope.You will need an A4 piece of card for the main pocket and an A6 piece of card for the tag. But as with all design this can be changed. the front flap could be shortened considerably, the tag size and design can be changed, even a doubled (folded) tag/card could be used inside.


Cut the pocket out (thin card or stiff paper works well)


The side flaps can be glued and fastened at the back....


OR.... put the adhesive on the back of the flaps and hide the flaps inside the pocket


OR...if you want to insert a wider card or larger embellishments, fold the sides flaps to create a "w", which will create a expandable gusset.


The little stand is attached at the back and will fold flat, the bottom of the stand is designed at a slight angle, this again can be adjusted.


I did find it best to copy the template and paste it in "Word" I reduced the margins to 1mm and expanded the picture to fit the A4...maybe there is a better way..will have to put my head round the best way to share this sort of thing....I am so not techie...can you tell!!!!


Thursday, 8 April 2010

MATCHING GIFT BAG.

This is a matching bag for one of the gifts I decorated in the last post. It's made out of a recycled A4 envelope. I co-ordinated the papers with the gift and used a sketch design from Clare's Challenge at DO CRAFTS. Again I used a sheet printed from a free download at Activity village
I added a PC printed quote, some old buttons and embroidery thread. I stitched the buttons on but this was very fiddly as it was not possible to see exactly where to stitch (my fingers seemed to get pricked more than the paper!!).
The circles were made using the method in the torn circles post. N.B. tearing on inkjet printed paper will cause the ink to bleed...this worked in my favour as I wanted to create a distressed look, and while the edge was wet I used a dauber to add some ink..same colour as mixed in my previous post.

TO CREATE THE BAG:-
Trim the top flap off an old envelope.
Score round three sides - you can make the sides and bottom as narrow or deep as you require - score approx a ruler width across the top opening. Score on front and back and crease along score lines.
THE PICTURE SHOWS THE MIDDLE FOLDED...THIS WAS ONLY BECAUSE IT WAS A USED ENVELOPE WHICH HAD BEEN STORED FOLDED

Open the envelope and shape into bag, nip along folds and reverse the original side fold lines so that they face inwards.


This will leave a triangular piece each side, these can be tucked under and glued down...or more fiddly, pushed back inside the bag
THE PICTURE SHOWS EACH METHOD


The top can be finished two ways.
1. Fold the top flap in, which can then be left as an open bag.... this can then be punched and ribbon threaded through to create handles
OR

2. The top can be folded over and fastened front or back to create a sealed bag.
It's surprising with a bit of creative thinking any damaged and marked bits can be disguised with decoration.


Tuesday, 9 March 2010

Kraft card.....lookie likey?!?!

Daft title.....apologies!

The whole purpose of this post is to have a practice at making kraft style card blanks, which are so popular at the moment (and I am a big fan, they suit so many styles but they are also quite expensive), plus I needed to come up with some card blanks to use tomorrow at my cardmaking workshop, especially as I had a non-existent budget.


This finished card is a bit of a cheat... a hybrid card...a mix of recycled stuff and proper cardmaking things. I made this card in honour of Chris (please check out her blog her cards are truly stunning) as the flowers were part of the prize that I received from her blog. I loved the colours of these flowers and I thought they went so well with the colour of the card, and co-ordinated with the old lace and buttons. I also used some nestabilities to cut the mats and a rubber stamp for the greeting and the floral detail inside, but I used pens and daubers for the stamping and distressing.


Right... the cards...messy and bit time consuming but turned out quite well and so far for 80p, plus glue , I have made 15 cards and have some spare paper left over.
I used some brown wrapping paper from the Post office, some cheap PVA and some old pre-used Christmas Cards. Cut a strip of brown paper (wider and longer than the card you are covering) ....using a plastic card (NO, NOT YOUR CREDIT CARD!! BAD IDEA) spread a thin layer of glue on the inside back flap. Line up the straight edge of the paper against the spine of the card and smooth down over the glue (I found it useful to smooth and press with a rag rather than my hand).
Sand the front and back of the card to get rid of any glossy surface (this can be prepped first and may not be necessary if the card is matt)

Repeat the gluing and sticking process on the back and front flap (don't try and do both flaps at once, work on the back then fold the card back up and then do the front)

Fold the paper over the front flap and trim off any excess (for some of the cards I made, I tore the paper for a distressed edge and some I created a decorative edge and left some of the white inner flap, exposed). Apply the glue to the paper and fix down.
Next you have to be patient, they need to be left to dry. I put plastic between each layer (don't forget inside the card as well, then leave a flat weight on the top, they will dry quicker without but will tend to warp.

Once dry, rub your fingernail down the untrimmed sides, then cut off the excess.
So now everything is prepped for tomorrow....who's coming...don't know....what ages are coming...don't know...might end up talking to myself but then I am used to that!!!!!
While I am here I just want to say a very big thank you to the people who have left some really lovely, encouraging and amusing comments...I truly appreciate you taking the time particularly as I know you all have fantastic blogs, which I love looking at.
BIG THANK YOU!!


Tuesday, 16 February 2010

TORN CIRCLES...and three wishes from three little mice.

Clare's Do crafts Weekly challenge has a sketch this time and as it features a circle I thought it was a good opportunity to see if I could tear thicker cardstock and be more precise than the torn flower circles in the last couple of posts. The colour scheme is inspired by the Van Gogh Painting which is the very first challenge on the new blog, SCRAP THE ART. This is a great new blog which is going to use pieces of art to inspire and challenge, and it is not specifically about painting and being an artist, it's purely a starting point.


So I went back to basics and just used cardstock and doodling with pens, as I did in my first posts.
I sketched three little mice (I called them Cheddar, Stylton, and Eeedam) I doodle these mice all the time (mainly on my telephone pad) and they are just based on a simple rounded wedge shape, they were coloured with watered down ink from my pens. I tinted the yellow piece of card (this really was a horrible colour so it needed disguising)with daubers and pens. I then used a wet paintbrush to flick water on the ink, after a few seconds dab the water off with a tissue.
I used a black pen to doodle the border (a modern "homage" to Van Gogh's swirls.
I did use one cheat and that was glitter, watered down PVA glue was flicked on with a brush then sprinkled with glitter...this was my final influence from "Starry night".

THE CIRCLES.....


It actually worked better than I thought BUT PATIENCE is the key.
Choose a circular container or lid and again work on a spongy surface like the back of a mouse mat. Hold the lid in place and draw round (scoring) with an embossing tool or knitting needle DON'T be tempted to press hard, I ripped through the first time and it did spoil the effect, it's best to let the water do the work.
Next draw round with a very wet paintbrush, allow it to soak for a minute or two. REPEAT the process, scoring then wetting....allow to soak in again. Make sure you always hold the lid in place. Once softened try pulling the outside card away, it should pull away quite easily and neatly, if not, repeat the soaking until it does, thicker card will need several goes, allow it soak in properly before pulling.
IF YOU CANT BE PATIENT ....THE WHOLE PROCES CAN BE INTANTLY SPEEDED UP BY ADDING SOME WASHING UP LIQUID TO THE WATER, JUST BE AWARE THIS CAN LEAVE A WATER MARK BEHIND ONCE DRIED.


Sunday, 7 February 2010

ROSE CARD (Plus making paper roses)

I have made this card for two challenges http://creativecraftchallenges.blogspot.com/2010/02/challenge-6-roses-are-red.html%20which which has a rose theme. (lovely to see Creative Craft Challenges up and running again.

and Claire's Weekly challenge which has an inspiration picture
The picture is of roses in a heart shape on a bed, as the bed is possibly a hotel bed I thought I would add some chocolate into the mixture as in a posh hotel you might be lucky enough to have a chocolate left on the pillow!!


I created an easel card out of a scrap of ivory coloured card then cut out a heart from another card, as the card didn't match I coloured it pink - Wet around the heart with a very wet paintbrush use a felt tip pen and draw round the wet edge allowing it to bleed, use the brush again to draw the colour over the entire surface. Before it dries use a darker pen around the very edge of the heart. Once dry draw doodles and hearts on top corner. Front panel has the top torn and was tinted in the same way as the heart. Attach the heart to the front panel creating a pocket (silicone glue or a wet adhesive which is held in place with a peg until it dries, is best for this).
I have lightly glued the chocs in the pocket along with some packaging used in gift parcels. I also used some nail varnish on the flowers but wishes I hadn't, it wasn't as sparkly as I expected.....Moral of story...always test ideas on scraps first!!!!!


TO MAKE PAPER ROSES :-


Cut a strip of paper (size depends on the size rose you require)

Pleat strip, then cut a petal shape DON'T FORGET TO ALLOW A PIECE AT THE BOTTOM OF THE PETAL EACH SIDE, THAT REMAINS ATTACHED!!

Unfold the row of petals....on soft mouse mat rub the handle of your scissors on each petal to make them curl.

Dab glue all the way along the straight edge. (oops!..glue is not visible in picture...that could be because I forgot to put it all the way along....!!!)

Roll the strip around the tip of a cocktail stick, nipping the base as tight as possible.

Shape petals, than take stick out and allow to dry.

To make a fuller rose , add another row of petals, facing the curls outwards.

The base of these roses can be a bit bulky but they can be hidden in a group or behind something as I did, or disguise them with leaves.