


 Meet Roddy....... Rudolf's biggest brother!! He stems from a simple sketch of an oval. The card was created for Creative Card Challenges second challenge "Christmas fun". http://creativecraftchallenges.blogspot.com/ I thought it would be fun to have Roddy bursting out of a parcel.... his head wobbles as it is mounted on an arched strip of acetate. Again the card has simply been created using pens and this time some scraps of wrapping paper (which my daughter had left all over the spare bedroom floor after she had been wrapping shoeboxes to be sent away as gifts). The inside of the parcel is a scrap of card covered in a glittery piece of paper (again wrapping paper...20p for a whole sheet!!). then covered again in a decorative paper. Poke a hole in the front of the parcel then tear outwards. Sketch a large oval for Roddy's nose then add an arched shape for the top of his head and another for his chin, draw his eyes, antlers, ears and mouth and add a curved v shape on his nose for a highlight. Outline in black and colour with felt-tip pens, I very lightly moistened the colours with a damp paintbrush to soften the lines. Roddy is then cut out and attached in the centre of the torn parcel. Use a small price label tag to decorate the parcel. The snow effect down the side of the card is created using a Correction pen. Finish the card with a couple of scraps of ribbon and the "surprise" greeting handwritten and decorated with tiny holly leaves.
As I created the card blank myself from a piece of black card and it is quite deep, I used some matching paper to make a simple pleat envelope. To make envelope cut a piece of paper double the height ( if you have made a tall card turn on side and use this measurement for your height) and add approx 6cm, add 6cm to the width measurement. Lay the card on the paper and fold up bottom flap leaving approx 3-4cm of the top of the card exposed. open flap and this time fold in approx 2cm in on each side (this can be adjusted according to the depth of your project). Fold bottom flap back up and then fold down top flap. Open again and trim off the small folded in pleats from the top flap. Glue the touching pleats together. 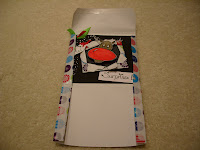 TIP: MAKE PLEAT ENVELOPES FOR 3D DECOUPAGE CARDS.
Will try and add my design sheet for ovals, as I have said before I am definitely not an artist but I think anyone can roughly sketch a shape and add some small details and eyes to create cartoon characters... There is a lovely article on sketching cartoon characters in Issue 36 of Simply Cards and Papercrafts by David and Angie Parkins. Really simple but clever characters to create.
TIP: MAKE PLEAT ENVELOPES FOR 3D DECOUPAGE CARDS.Will try and add my design sheet for ovals, as I have said before I am definitely not an artist but I think anyone can roughly sketch a shape and add some small details and eyes to create cartoon characters... There is a lovely article on sketching cartoon characters in Issue 36 of Simply Cards and Papercrafts by David and Angie Parkins. Really simple but clever characters to create.


4 comments:
Great project!
Thank you for joining us at Creative Craft Challenges... Good Luck
Donna x
hi diane nice to see you entering our creative craft challenge again, i must say im loving roddy the reindeer and your whole design, good luck to you
sandra xxx
Roddy is fab hun, love the big oval nose, you are more creative than me I just ink a stamp up!
hugs Mandy xx
Hiya Roddy is cute!thanks for popping by my blog and nice to know theres another Norfolk person in blog land.Hope to get to know you better .
hugs judex
Post a Comment