Showing posts with label digi image. Show all posts

Thursday, 28 June 2012

Two for……Phoebe!

This week I have had a couple of projects to get done.  Katie’s friend Phoebe is moving into a new house this week. (plus Happy Birthday Phoebe)
Less is More has a paper piecing challenge….fab ….despite not being a fan of cutting out (very “scissorly” challenged) I actually love the look of paper pieced images and its a perfect technique for cardmaking, without proper cardmaking equipment…just  scissors, scraps of paper, printer and of course trusty glue stick.
DSC_0097
The brilliant image was free from The Graphic fairy. I love retro images like this and they lend themselves to quirky quotes…..this was perfect to make a quote for Phoebe who …..a) is a bit of a domestic goddess and b) likes a cocktail ….or two…...or ????
DSC_0096
Originally I was going to piece more of the elements but these images always look great in their original black and white form so I just highlighted a couple of elements, which I think stand out better than with lots of other detail……oh and dont look to closely at her sleeve under the book….the original piece went missing, I suspect its in the bin, I had to improvise with another scrap but the pattern isn't quite right!?!  …….. (note to self….DONT TIDY MID PROJECT!!!….goodness knows why I decided to tidy as I went along….I normally always work in total chaos).
DSC_0087
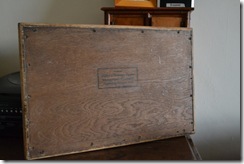
The second project was a bit of a warm up and trial piece. Katie and I worked on this together and I kindly let her do all the donkey work as the old wooden picture/tray I found in the charity shop (£3.50) had been decoupaged then varnished….and OH BOY! had it been varnished…. so it needed a lot of stripping and sanding.
Sadly we didn't think to photograph it first but this is Kate mid project….DSC_0081
We were using the image transfer technique I have been playing with lately. The text was complimented with another great image from The Graphic Fairy and its not only thanks to The Graphic Fairy for the image but also all the great inspiration I have found from people who contribute to the site, particularly the link party on Mondays.
It was  a great learning curve……the image needs more burnishing when applying on wood (back of a spoon works fine) and the tricky part was sealing the ink (inkjet printed image), Although we didn't do it on the tray, I have found that heat sealing it (iron over with a protective layer of kitchen roll) helps set the ink. We found spray varnishes work best but acrylic varnish worked well too
 ….if anyone has any other suggestions I would love to know.
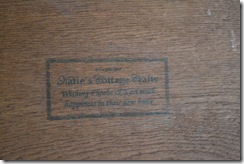
We finished the back with a “pseudo” makers label” with a personal message .DSC_0095DSC_0094
Now onwards and upwards with some much bigger projects for Katie & James’ Cottage…… it will soon be ready to move in!!!


Tuesday, 29 May 2012

My jar ‘runneth’ over…..

The sun is shining and I have managed to squeeze in a little “Less is More” crafting…. although my eyebrows shot up to my “very grey” hairline when I read the challenge was to create a card other than square or rectangle…..oh heck… I thought it was tricky last week creating a child's card and keeping it clean and simple ….but without stamping or using my cardmaking stuff…. I could only think of novelty style cards which were definitely not CAS…. so not sure if this totally qualifies….

DSC_0021

but it was a great excuse to use the adorable free print sheet from The Graphic Fairy  that I recently found.

Luckily I also had some printable projector acetate from a computer course I did many years ago……never have needed to create a presentation….so I still have more or less a full packet…and I thought the acetate would be perfect to print the jar on.

DSC_0010

After printing the jar I created a text box to position in the jar…..then deleted the image before printing the text on card……then before I attached the acetate and card together (attached along the top with double side tape) I highlighted the text with a couple of stencilled hearts (chalked with eyeshadows!!)

DSC_0012To attach a back panel I scored the top of the acetate section to create a hingeDSC_0019 which fixed onto another piece of card

Once the three panels were joined I cut out the shape of the jar.

To finish I tied on a couple of scraps of ribbon from my salvaged stash.

I photographed the card with some confetti sequins as I am going to pop a few  a handful in the envelope…..

       ……dont you just love it when people do this!?!? Winking smile

Now must go and have a play with the clematis stamp from Lynnda at Oak House studio.…..Lynnda is planning an ambitious 24 hour craft with “One Stamp” and I am supporting her by having a go at creating some revamped home decor projects…… one of my projects is hopefully going to be immensely useful but has to be one of the oddest and possibly the most unappealing projects  I have ever created in my papercrafting!!!!!!!!


Wednesday, 28 March 2012

Bling went bleuggh!…and “Just Because”

I’m not great at “blinging” my cards and it’s doubly difficult for my blog as I cant use any of my commercially produced cardmaking stuff…what I do have is some old iron on stones and some “Belly button” jewellery (very sparkly actually) that belonged to my girls.  I needed these for this weeks Less is Mores challenge. This week they have challenged us to combine three of the previous challenges, fab for me as this has given me chance to catch up on some challenges I missed when I fell into my blog hole last year.

I went back to Week 18 [Jun 4th]  Monochrome, Week 19 [Jun 11th]  In the Frame, Week 20 [Jun18th]  Monogram…..the only trouble is I had to abandon Monochrome as I needed to add a “touch of red” (Week 9) as the card began to look very Weddingy! (not a proper word), I bit the bullet and went for ……Week 43 [Nov 26th]  Bit of Bling.

S1052527

I found a fab frame here http://www.edupics.com/coloring-page-frame-i11330.html and used “RAGE” font inside a text box, to create a Monogram. I printed the design on my basecard and on a scrap of card, so that I could cut out the letter….I hate cutting out especially circles, generally I neaten cut edges by filing them,  this time I filed it from back to front to create a little gutter/ridge so that I could faux enamel the panel, it took two coats of nail polish to create a shiny finish and I found it easier to just tip it on….sadly this is where it went a bit bleauggh I had already stuck the diamantes into the first layer of nail varnish….the second layer went over them and just made them look like little clear dollops!!!!!!!!!
S1052522 S1052537

As this is a hand delivered card I went to town with the dimension and mounted the panel on corrugated card, this was covered with a scrap of ribbon tied round and finished with a bow. I loved the frame so much I decided to use it again and repeat the design on an insert but this time with the greeting inside.

S1052528

As I have sooooooo many weeks to catch up with I decided I had time to make a quick “Just because” card. These are some of my favourite cards to make….generally quite daft and for no real occasion….just because!!! I love leaving silly notes and cards for my family particularly if I think they could do with some encouragement or cheering up. I always left little hidden cards in my daughters school bags or lunch boxes….I have even hidden them in sandwiches!!!!

This little stone has been sitting on my desk since our last holiday and I thought he would make a cute mouse.

S1052526

Recipe for this one …..Week 18 [Jun 4th]  Monochrome (thought I better have another go)….Week 23 [July 9th] Something with Legs (if he was real…he would have legs!!!)……Week 28 [Aug 13th] Use Ink (*hang head sheepishly*…my pen had ink in it …does that count?)

Well the card was extremely quick to make…but rubbish to photograph….I know…I will photograph it out in the sunshine…..bad idea….my very needy cat thought I had come to lay in the grass with her and of course she had to get right under my noseS1052538 so I moved it…S1052541

S1052544moved it again..S1052546

and again ……and again….        S1052547       

ok I give up…

I will take your picture then!!!!!!!!!


She’s not bad for an old girl (17!) and no she isn’t winking she only has one eye!!!

………P. S. Steve….. the grass needs cutting


Monday, 28 March 2011

Knew I kept them for a reason!


Well it's sketch time at LESS IS MORE....mmmm.....I have a bit of a love/hate relationship with sketches.....but I like a challenge.... and FAB N FUNKY have "a do it more than once" challenge (multiple folds on a card), so I decided to flip Mandi and Chrissie's sketch and add in some extra folds for a little something extra (also wanted to use up more scraps!!) I took a couple of 10cm wide strips of card scored a couple of flaps either end of the longer white strip and created a hinge on the black strip, leaving it long enough to tuck under the white flap on the right.


I then attached these together with photo glue (nice and repositionable).


The wonderful little image was from Meljen's designs which I found through Free Digital stamps. The image is perfect for my husbands Anniversary card (he's and electrician so particularly apt!)


Again I was faced with colouring an inkjet image without promarkers!?! chalks were too dull.... it was then I decided to go in for the kill......lurking in my gel pen draw were some flourescent gel pens inherited from my girls......I actually thought they were disgusting but as I never throw anything away......I felt sure they would come in useful for something......


....FINALLY their moment to shine (literally) has come....and incredibly they still worked (they are years old!!!) I did find that the printer ink could still be picked up with these but as they were a fine rollerball I could manage to colour in carefully without to much disaster. In fact I was impressed how well they flowed and blended, but to give it a finishing shine I covered it in clear nail varnish....three coats...had to do a third as I managed to stick my thumb print on the second (ooops, wasn't dry!).


I created the message in Word and highlighted the "light" word with the gel pen, Mandi (Less is More)has done a clever little tutorial on matching font colour to computer generated images, I really must have a go at this. It's so nice to have such helpful tips, it's fun joining in challenges but learning something new is a great bonus.


Now for the big question. .....is there a crafting black hole/Bermuda triangle?


Last week I had to do a bit of batch card making, I am completely rubbish at tidying up as I go along, so gradually the desk disappears...and so does things that I need....as I worked I lost my lovely metal handle Swann Morton knife, my Fiskars double ended embossing tool, my medium embossing tool and the new disposable Swann Morton knife I got out to replace the missing metal one! Now my lovely little craft room (was Gina's bedroom, so it's a special place for me), is not very big, so they cant have gone far,....... I surrendered and tidied everything back in it's place......STILL MISSING...this is nuts they have to be here.


Every week as I am nosing round blogs I see WOYWW where lovely crafters take a snap shot of their desks etc and show whats there.....


......well I have decided to start WOYCSF (What's on your craft space floor!!!!!!) because this, during my search, is what I found hiding..... and I didn't know they were missing


and you guessed it.....no knives or embossing tools ????????????!!!!!!!!!!

They are officially .......Looooooost ........innnnnnnnn........Spaaaaaaaaaaaace!?!


Monday, 21 March 2011

Scrap box birthday.

This is a really economical card to make as it uses just a few scraps and a free digi image from CRAFT CREATIONS. The base cards was also created from a sheet of their new value pack of POPSET CARD, which I have to say is amazing quality for such good value, (I tried it with promarkers and it works well those too). At 10p a sheet it really is worth cutting and scoring your own blanks.

I created an embossed panel on the front with my new and improved embossing tool!!!

My original tool was only 6" long and the embossing ridge was made of card. I felt this didn't create a totally crisp edge. This time I used an old 12" ruler and attached it to a piece of a plastic chopping board/dinner mat. It is important to make sure that the ruler is attached in line (allowing a 5mm ridge) with the embossing edge or you will end up with a uneven panel when scoring. This time I didn't bother attaching the embossing tool to a bottom mat, it seemed unnecessary. Further details of my original design is here. I will now make a proper version as I think this works quite well... will post more detailed instructions later. It really can turn any scrap into an embossed mat that looks just like an embossed nestabilitie shape. As the picture above show you can also emboss directly on the base card quite easily, the worst bit that took a bit more care was down the spine.

Once the base card was created it was simply a case of draught printing the image, attaching coloured card over the image then reprinting. This was repeated on all the coloured pieces.
Each element was cut out of the required colours.
The chocolate cake was highlighted with a white gel pen (a correction fluid pen also works well for this).
The card was assembled and a present cut from the scrap card, decorated with a silver gel-pen and finished with a mock bow. A few salvaged confetti sequins created some movement over the design.

This card is created for a 5oth birthday, don't worry the recipient will not escape a reminder....it will have a lovely great big 50 inside........she's not getting away that lightly!!

And as it is with a CRAFT CREATIONS IMAGE I will enter it for their march challenge.
PAPERTAKE "Triple Tastic" challenge (my card has three balloons!)
SIMON SAYS has a birthday card challenge
DYSU wants a bow added.
and PAPERPLAY wants embossing.


Sunday, 13 March 2011

OFF THE PAGE AND A STEP TOO FAR!


Can't believe another week has gone and it's time for the next LESS IS MORE CHALLENGE. It's the week I slightly dread ONE LAYER CARDS, this time the theme is OFF THE EDGE.

Yikes!! this was going to be a challenge without stamps. Especially as Chrissie and Mandi at LIM decided to up the game by decreeing "no embossed lines".....rats..... just when I thought I would continue with my "Faux" faux nestie technique from the last challenge, but this is what I love about the site, they continually push the boundaries!!!

WELL.....The only way I think I was going to achieve this was to design on the computer and then chop the card down to size, BUT, this is a budget crafting blog and the idea of wasting card made me slightly wince!! SO..... I decided the best thing would be to create a design on A4 which would then cut down into two A6 long cards, this way my design could also not only be.... off the page........

but over the page.........


......and inside the page!!!


I used a lovely little free digi I got sometime ago from FRED SHE SAID. I copied the flower and pasted it several times across the middle of an A4 landscape page in Word (set margins to minimum). I then opened another page, used the same settings and created two columns. At the bottom of the columns I created the messages. I then printed both pages on the same sheet, reprinted the flower design on the inside.

I love carrying the design onto either the back or inside the card when I use my stamps..to be honest I don't often do both on the same card!!!!

To enhance the design I painted inside the image with neat bleach,leaving some highlights of yellow card (avoid the printed lines as these can smudge).

So I was pleased with my first card.....but decided to push the design a bit further for the second.
  • I highlighted the scrolls with bleach...pleased with that

  • Added some dots on the little flower....liked that

  • Decided to create a bleached panel over the message....carefully masked the area with rulers and tape............YUK WHAT A FAILURE!!

A step too far......


Will now have to rescue this card!!!!!!

The rescued card is now here


QUICK TIP:- if cutting and creasing your own printed card , it's worth putting the folded card inside a piece of clean paper before you finally neaten the crease.....
.....on my first card I discovered too late that even though the ink appears dry it can drag across the clean areas!!!


Not sure if you can see but by using a paper the ink transfers onto the paper ....not the design!

Thought these cards would be suitable again for PAPERTAKE as this time the cards have a bit more Lemon Zing

And as SIMON SAYS made me so welcome last week even though I had a hand drawn image I thought I would join them again with a proper digi image.

CREATIVE CRAFT CHALLENGE is all about thank you's this fortnight, so my first card should fit in with that.

and my final challenge is a new one for me ONE STOP CRAFT CHALLENGE who are also looking for clean and simple.

Just realised my photography is absolutely rubbish.....the card was a beautiful lemon colour and doesn't show in the main pictures....how disappointing :(


Thursday, 20 January 2011

LILY - DIGI TO SKETCH

I decided to have another go at converting a digi image to a pencil sketch....trouble is I didn't think this one through. ...so experienced some problems.

The original post and technique is here

I took inspiration from the lovely bright cheerful picture chosen for Clare's Challenge at Docrafts (apologies for turning it into a sympathy card but I thought it would be useful...thankfully dont need one at the mo!!), plus I decided to enter into Creative Craft Challenge which this time is Monochromatic.........and I decided it would be extravagant to use watercolour card so I thought I would use a standard piece of card (approx 220gsm)..not too bad as there was not much watercolouring to do....which presented the next problem as most of the image was to be white it left a lot of ugly pencil lines to exposed, particularly as I put far too much scribbled pencil on the image to be traced and ended up with lots of nasty smudged areas, the card definately didn't take well to having the marks rubbed off!!!

so this is how it ended up...wasn't very happy with it looked quite tatty!?!?!


In the end I only very lightly traced the image then sketched over with an ordinary pencil crayon. I finished the second one with a PC printed greeting and a piece of grilled organza ribbon (will post more details about that later!!)


Wednesday, 19 January 2011

DIGI TO SKETCH

I have made this card for a challenge at CRAFT CREATIONS
I also used a free digi image that can be found on their blog. It was perfect for an idea I wanted to try. There are now so many great digi images, many of them free which I do think is amazingly generous of artists to share their work and I think it only right to acknowledge their work and make sure you do not break any terms and conditions they stipulate.

Sometimes I have only wanted to use part of an image or not wanted a black outline or in this case, I wanted to do a watercolour techniques and as my printer is inkjet I sometimes find the outline can bleed into the colour.

So I decided to convert the image into a sketch.......


1.First import the image into "Word" to be resized.
Then draft print the image and roughly cut out the piece wanted.
Turn the image over and scribble over the back with a soft pencil.


2.Attach the image onto card (I used a scrap of Bockingford watercolour paper) with low tack masking tape (I used some cheap insulation tape my husband didn't want as it didn't stick properly...perfect!!)
Trace over the image with a ballpoint pen (it helps to use a different colour so it's easier to see where you have traced)


3.Remove the top image and using a pencil (HB or hard is best) sketch over the traced lines.


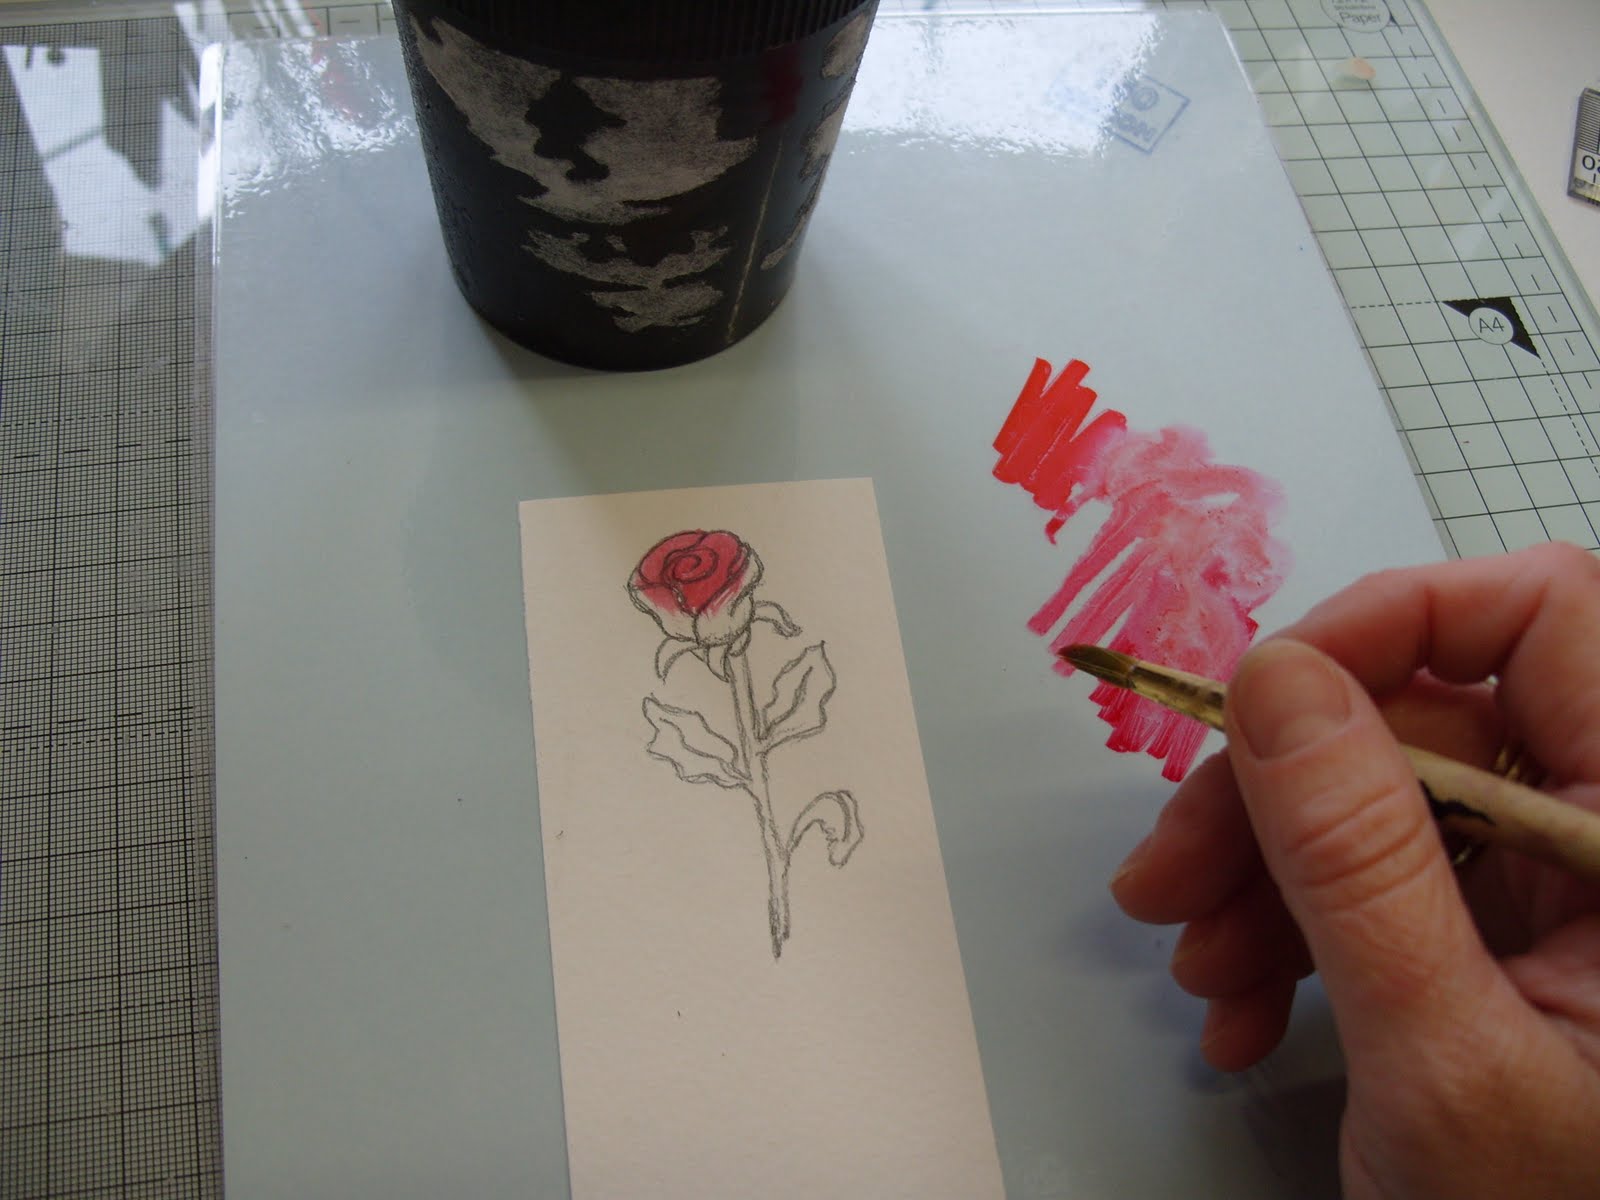
4.To colour the image I used ordinary waterbased felt pens. Scribble these onto a plastic sheet and then using a wet paint brush apply.


5.The green was very vibrant so I mixed in a bit of dark blue to darken the shade.

I trimmed the image down and tore the bottom edge and tinted with some more of the pen ink...I really like this effect ...especially as it disguised the dirty finger print I managed to put on the bottom!!


I finished the card by mounting it onto a bit of sandstone coloured card, tied some embroidery thread round and added a message printed on the PC.


I am also hoping to enter this in to CHALLENGE UP YOUR LIFE blog's "clean and simple" challenge....still trying to keep to this style this year!!!