Showing posts with label envelopes. Show all posts

Friday, 22 April 2016

April ....something blue....

I have been lucky enough to join Oak House Studio for their "Take Five" event. For the next five months five different designers will be challenged to use Oak House products on a chosen theme.....and I will be joining April's theme "something blue".
This has been a massive excuse to lock myself away with not only some of the very unique Oak House Stamps but their gorgeous, fantastic inks....so much fun in one little bottle ....and no I don't mean wine....good obviously ...but this is so much better for you....although if you don't wear rubber gloves (I DON'T) you will have an attack of the inky fingers.....who cares...I love it!!!!
I have had so much fun, splatting, spraying dipping, dripping, dunking and dying....the possibilities are endless and I haven't limited myself to papercrafting.


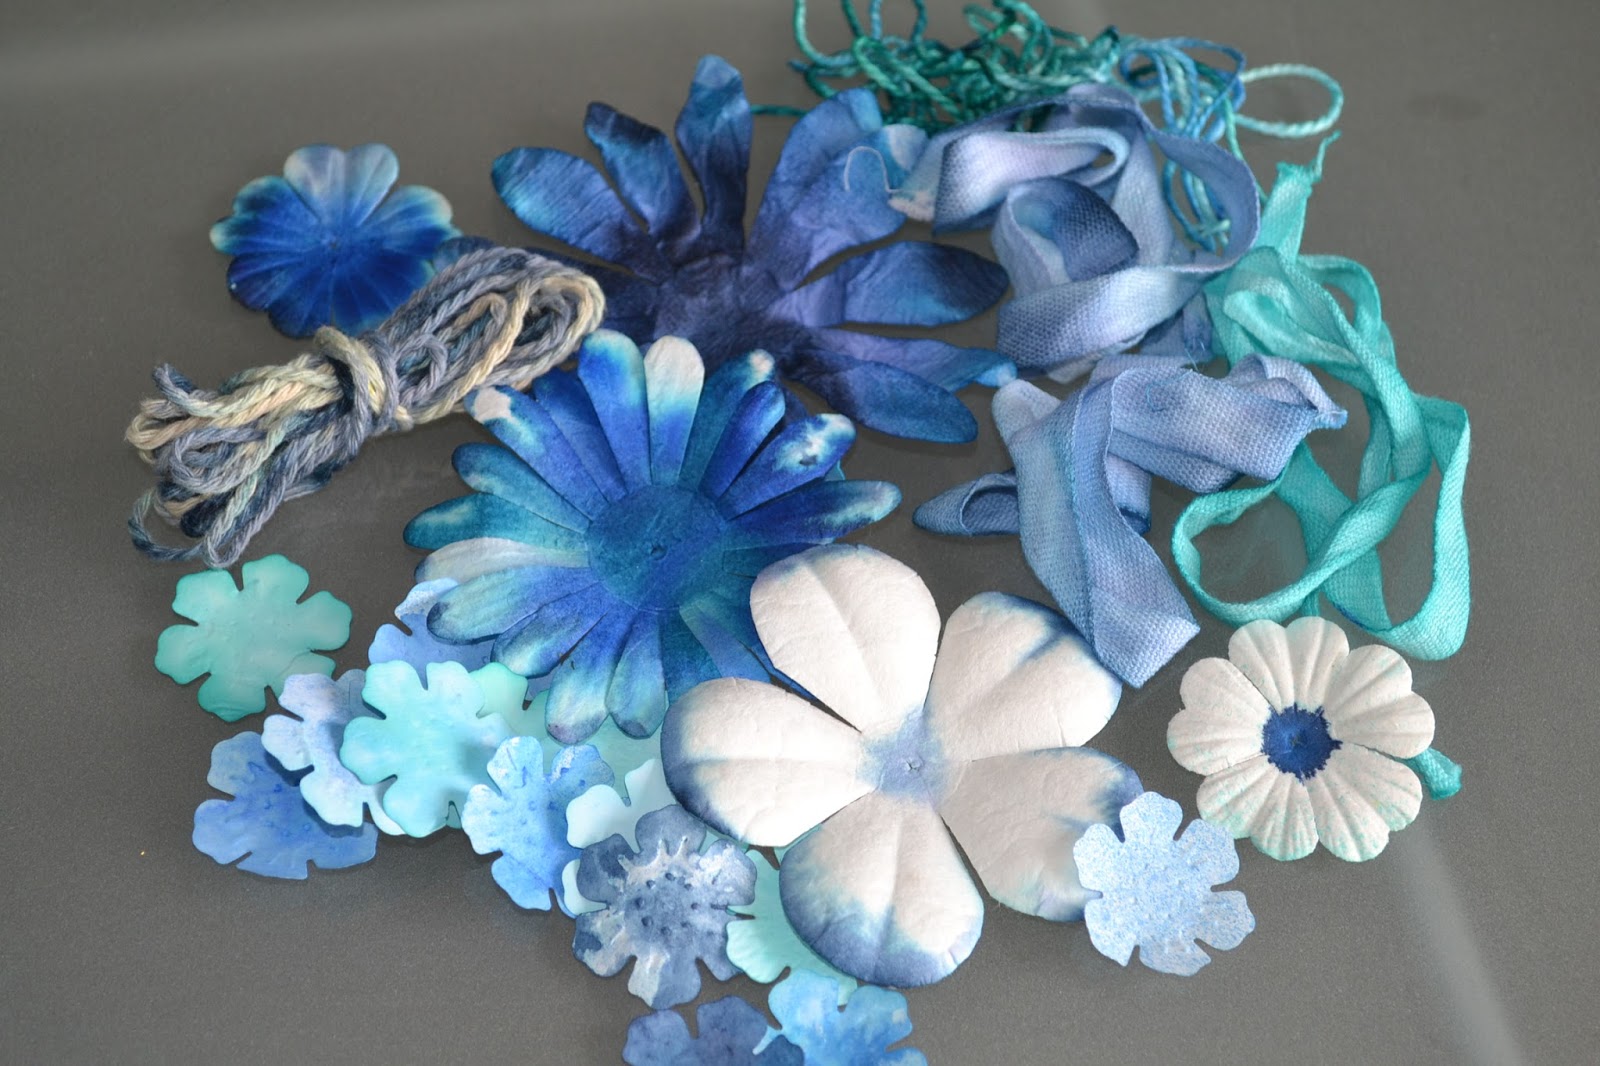
Oak House very cleverly now sell all their inks in concentrated form which you can make into full bottles of regular strength spritzing ink plus have tons left over to use in different ways. I have been painting with them, dying paper, ribbons embellishments etc., adding them to different mediums and fully exploiting the fact you can dilute to change the intensity and mix the colours to create an incredible variety.

On the blog I made a CAS card with an inky background but I haven't got an envelope
 (I think I have warned you previously....don't store ALL your envelopes somewhere damp and cold....they like to seal themselves.....grrrr any one want to buy a couple of hundred pre-sealed envelopes?!)  .......so as this is my crafting on a budget blog I thought it would be good to make the envelope for my card and in contrast it would be ornate.

 This bit of paper was destined for the bin, it was just a protective backing piece when I was working but I loved it already had a panel masked out for writing the name.
Unfortunately it's not big enough ...time to get creative....using a scrap of paper and Oak House Pure Gold Acrylic ink (love this bottle of liquid gold....so shiny in real life) and a scrap of sponge,  I inked over the O.H. Thorseby Backgound stamp then spritzed over with diluted Jubilee Blue and Hey presto....instant posh verdigris....what fun...not intentional but one to remember....particularly as there is "rusting" technique I want to try.
 
Quite simply I glued the stamped panel over the top of the folded inked paper (fold edges in to form a slight overlapped join at back, then seal bottom edge with double sided tape), trim sides to match pouch and fold to create the flap.
....who needs proper envelopes.... ;-)

Check out the Oak House Studio Blog for my "bespoke" dyed tissue paper gift wrap,  plus all the other designers projects this month.....and of course the Shop for the amazing inks.


My card is also on the blog and I'd like to enter it into Hiding in my Craftroom's  "LOL" challenge.... it has actually got four layers (base, dyed panel, silhouette panel & word tab) ....this is quite a lot for me....not great with layers!!!!!!
....thanks for popping by :-)


Tuesday, 7 February 2012

Paper chains and doilies…..pinteresting!

Well I am spending far too much time trawling  Pinterest but it does throw up so many inspiring ideas.  One was a page from a french book with a diagram for cutting a chain of birds….it’s such an old technique  (remember cutting paperchains of dolls) but while we forge ahead with new exciting craft ideas we forget the simplicity of older techniques.

Less is More has Aqua as its colour theme (big HAAAAAPPPPPY BIRTHDAY!!!! Party smile  to them and congratulations on a very successful year, you deserve a big pat on the back for not only providing an inspiring blog but bringing so many crafters together).

The theme was perfect for revisiting the cutting idea…I cut a strip from an old envelope (Liz Earle’s promotional stuff has just the right colour for the challenge…. I do like Liz Earle products). After folding the strip into four panels (concertina style) sketched a little bird on the back, he is sitting on a branch which will create the joining element…..then cut it out.

S1052425 “Voila”…..one little row of birds ……ok so they still look a little prehistoric…..ala the bird stencil I created a couple of weeks ago……….. but they are hopefully recognisable (will really have to practice sketching birds, I didn’t take art at school because I couldn’t draw…..seems it was a wise decision…but then I promised myself many years ago that I was not setting out to be an artist…but that shouldn’t stop me having fun creating and crafting!!!!).

S1052420

Not sure if I did the right thing but I decided to tone down some of the “white space” with more colour  (real reason was I was disguising a reject card that I had scored incorrectly).  A quick flick with and old toothbrush and some watered down emulsion paint and a bit more aqua was added.

S1052419

The other Pinterest find was creating an envelope from a doily….I changed the idea a bit as I felt it needed a liner. I have lot of large doilies left as Katie bought a big packet at Christmas to make some angel place cards (works xmas dinner)with the smaller ones (they had doily bodies and wings and a proper photograph of each persons head ….they looked so funny….especially the blokes!!!!!!!!!!!).

As I make a lot of my own card blanks I am always keen to make my own envelopes as well.   I simply used a matching piece of paper cut the same width as the card but folded round with a slight overlap.

S1052422

I placed this on the doily and folded the doily sides in. With a glue stick I attached the doily only where it came into contact with the lining paper.

S1052427

The eagle eyed amongst you will notice that I decided the birds needed wings…now not sure????? I truly am the most undecided person I know….or am I?!?!?!!!!!

I would also like to submit this for DYSU challenge this week as anything goes!! This is another lovely friendly challenge site and massively popular…. and as anything goes I will also include a pic of a little thank you gift I have just made with the scraps left over from my project….I needed to make some packaging for my Handmade hand scrub …..also inspired by Pinterest!!!

S1052428

….and if you check out Pinterest…..warning ….it is quite addictive…and can seriously reduce your crafting time.


Thursday, 1 July 2010

Banana Frog Guest Designer

I have been extremely lucky to be invited to be Guest Designer for the Banana Frog blog this month. The stamps I have been sent are superb...Totally Tropical.....Funky Paisley....and Take note....and I could not seriously pick a favourite, I loved them all, and they are definitely sets I know I will be able to use again and again and again.

The sets are truly brilliant value as you will be able to get so much from them and there are so many elements for the money, but I have stayed true to my blog and kept the costs to an absolute minimum for my projects. The main projects and details will be posted on the Frog blog but I thought I would supplement them with a little post on here, particularly as both the cards didn't have proper envelopes so I had to do some adapting. The little "Thanks! card was packaged in serviettes which I customised with inks from a pen and then tied with thread and finished with a co-ordinating tag (I even ironed the serviettes once they were dry from the splatting technique!!.....how dedicated was that).
The second card used an junk mail envelope, which i decorated with a stamped liner and matching panel on the front (to cover the preprinted address).
It's quite easy to line an envelope. Lightly draw round the envelope... there is no need to cut all the bottom section out....it isn't going to be on show.
Just glue the piece attached to the top flap.
The other thing I had to improvise with was the acrylic block......I hadn't got one on the boat so I used various things lids sides of jars....and in this case the bottom of a glass....I was leaning on the seat of my stool which is very firmly padded and this gave a great impression as the bottom of the glass wasn't totally flat.
I made a third card for a friend using similar techniques to the first card, but I also had to do a little masking. As I didn't have a post it note to stamp a mask on I stamped the image on paper and held it in place with some rubbish (not sticky!!) insulation tape.
I also decorated inside the envelope for this one but this time I lined it with a bit of recycled tissue paper. All my cards were made while we were out for a quick trip on our boat (floating shed) so I really didn't have access to any proper crafting stuff, but I so enjoyed playing with the stamps and just a few old pens.
This post is a bit hurried as we are off again for a week on the boat, if I get a chance I might supplement this a bit further with some more of the pen techniques.


Thursday, 8 April 2010

MATCHING GIFT BAG.

This is a matching bag for one of the gifts I decorated in the last post. It's made out of a recycled A4 envelope. I co-ordinated the papers with the gift and used a sketch design from Clare's Challenge at DO CRAFTS. Again I used a sheet printed from a free download at Activity village
I added a PC printed quote, some old buttons and embroidery thread. I stitched the buttons on but this was very fiddly as it was not possible to see exactly where to stitch (my fingers seemed to get pricked more than the paper!!).
The circles were made using the method in the torn circles post. N.B. tearing on inkjet printed paper will cause the ink to bleed...this worked in my favour as I wanted to create a distressed look, and while the edge was wet I used a dauber to add some ink..same colour as mixed in my previous post.

TO CREATE THE BAG:-
Trim the top flap off an old envelope.
Score round three sides - you can make the sides and bottom as narrow or deep as you require - score approx a ruler width across the top opening. Score on front and back and crease along score lines.
THE PICTURE SHOWS THE MIDDLE FOLDED...THIS WAS ONLY BECAUSE IT WAS A USED ENVELOPE WHICH HAD BEEN STORED FOLDED

Open the envelope and shape into bag, nip along folds and reverse the original side fold lines so that they face inwards.


This will leave a triangular piece each side, these can be tucked under and glued down...or more fiddly, pushed back inside the bag
THE PICTURE SHOWS EACH METHOD


The top can be finished two ways.
1. Fold the top flap in, which can then be left as an open bag.... this can then be punched and ribbon threaded through to create handles
OR

2. The top can be folded over and fastened front or back to create a sealed bag.
It's surprising with a bit of creative thinking any damaged and marked bits can be disguised with decoration.


Thursday, 19 November 2009

Paper

As I have created Robbie using more than pens (for once) I thought it was time to explore paper for a bit. Paper is one of my addictions and I have stacks of beautiful backing paper and card that I regularly stroke!?! but all around the home is a variety of paper which is great to use on cards.


I recently went to a D.I.Y. store and was collecting some gorgeous wallpaper samples to create a "feature" wall in my lounge....naturally these sample won't go to waste! And I had great excitement the other day when some halogen bulbs that I had ordered from the Internet arrived wrapped in Chinese newspaper....can't wait to see what I can do with that. I do have a box that I keep all my recycled cardmaking stuff in and it's full of paper and card that I have kept from packaging, magazines (Grazia is printed on lovely paper which has got a lovely soft look to it!), exercise books, folders, graph paper (there are free downloads of stationary style paper on the internet), wrapping paper, brown paper, even envelopes (some have some great patterns inside them).


I must be the only person who likes to receive junk mail, some glossy brochures are great for collage and always keep the return envelopes ....these can be turned into a card blank (will post an example later), plus the inside of many envelopes have some very interesting patterns, great for men's cards. Tissue paper, kitchen roll, serviettes even toilet paper are all also useful when making cards. And don't forget recycling commercial cards. IMPORTANT NOTE: Please remember not to use someone else's artwork or design for commercial use. I hope any artist or manufacturer is happy with people using their cards in another form before it ends up in the bin, especially as it is not for profit.
I find it useful to cut the greetings off cards and these become instant message plaques for your own designs. If the image on the front is not to your taste don't forget the reverse is most probably plain white and very useful for other projects, the back piece can also be used, even if it has printing in the centre, this can be covered with an image or embellishment. If you haven't got a base card, try covering the entire card in paper, matting the design on the front then perhaps using matching paper to cover any writing inside. (Envelopes can be made out of wrapping paper as I did with Robbie.