Best Wishes to you all


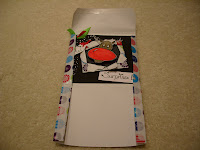
 Meet Roddy....... Rudolf's biggest brother!! He stems from a simple sketch of an oval. The card was created for Creative Card Challenges second challenge "Christmas fun". http://creativecraftchallenges.blogspot.com/ I thought it would be fun to have Roddy bursting out of a parcel.... his head wobbles as it is mounted on an arched strip of acetate. Again the card has simply been created using pens and this time some scraps of wrapping paper (which my daughter had left all over the spare bedroom floor after she had been wrapping shoeboxes to be sent away as gifts). The inside of the parcel is a scrap of card covered in a glittery piece of paper (again wrapping paper...20p for a whole sheet!!). then covered again in a decorative paper. Poke a hole in the front of the parcel then tear outwards. Sketch a large oval for Roddy's nose then add an arched shape for the top of his head and another for his chin, draw his eyes, antlers, ears and mouth and add a curved v shape on his nose for a highlight. Outline in black and colour with felt-tip pens, I very lightly moistened the colours with a damp paintbrush to soften the lines. Roddy is then cut out and attached in the centre of the torn parcel. Use a small price label tag to decorate the parcel. The snow effect down the side of the card is created using a Correction pen. Finish the card with a couple of scraps of ribbon and the "surprise" greeting handwritten and decorated with tiny holly leaves.
 TIP: MAKE PLEAT ENVELOPES FOR 3D DECOUPAGE CARDS.